I have been working hard on launching my own instructional design website. It is a place where I can write professionally about instructional design topics that interest me and where I can also take on more freelance projects. If you are interested in reading my latest blog posts or working with me then checkout WalkereLearning.com.
Miscellaneous
Q&A: Extra Credit in Canvas
An instructor asked me if his extra credit setup in Canvas would mess up his gradebook. He was using a weighted assignment group and the extra credit group was assigned a 0% weight, which I know you are not supposed to do, but I also thought that going over 100% in Canvas was also a “no-no.” Back when I was learning Canvas, I was told that there wasn’t a good way to do extra credit; but there have been many updates since then and I had to ask around again for a solution. I was hoping someone would have found a way by now and my coworker, Dena, came in with the win.
If you are also looking for information about adding extra credit to your course, then I encourage you to read this Canvas Instructor Guide article, How Do I Give Extra Credit in a Course?
Calculator App for iOS
I just completed the Lynda.com course, Programming for Non-programmers and I learned how to create a calculator app. I made a bunch of mistakes throughout the course, but I found it incredibly rewarding. I especially love that I now have a calculator built by moi!
I realized that following along with the instructor was difficult for me because I cannot type and listen at the same time. Trying to focus on typing code while also listening the explanation for using that code turned into a jumbled mess text-wise. I would run the simulator, thinking I had completed every step, only to find out that there were bits missing from the code. An =Int, or closing the {}, or even misspelling a word turned my computer screen into a huge mess of code and intimidating error messages.
It was nice to be able to rewind, pause or even watch a whole video over again to understand what I was doing. I also started using the //comment feature towards the end of the course to take notes within the code. That way, I would be able to look back in the project and understand what I was doing.
Here is an example of the notes I took in the code:
func updateText() {
guard let labelInt:Int = Int(labelString) else {
return
}
if (currentMode == .not_set){
savedNum = labelInt //not yet showing the total just setting up what happens when you press the addition or subtraction buttons
}
//add a number formatter to change the text a bit to add a comma or dot.
let formatter:NumberFormatter = NumberFormatter()
formatter.numberStyle = .decimal
let num:NSNumber = NSNumber(value: labelInt)
label.text = formatter.string(from: num)
// replace “\(labelInt)” with the formatter
}
func changeModes(newMode:modes) {
//make sure there is already information in the calculator. Then it will keep the last number on the screen until the user presses another numeric button.
if (savedNum == 0) {
return
}
currentMode = newMode
lastButtonWasMode = true
}
}
If you want to watch a brief demonstration of the app, you can check it out on Youtube.
VSI: Your Time to Interact with Students

Virtual Synchronous Interaction sessions — those mandatory blocks of time that need to be filled with something.
Many times the VSIs are filled with lecture sessions where the professor talks at the students and asks for any questions at the end. These sessions are boring. There is low student participation, lukewarm group discussions and a decrease in attendance due to the dragging experience. This can make a VSI seem like a waste of time to not only the students but the professor. Why have these sessions if students are not getting anything out of them?
Well, the words “student engagement” get thrown around a lot in conversations about online learning. Everyone wants it to be interactive and fun for students, but not every lesson can be fun. Sometimes students have to learn the boring basics. So, here are these mandatory sessions no one seems to know what to do with, just to make the course more appealing for the sake of student engagement. Now what?
VSIs is your opportunity to interact with your students similarly to an in-person classroom setting. Here are some things to consider when planning your next VSI:
Flip the Classroom – Instead of doing a lecture, have the students read the material and prepare for a group discussion before the VSI. Then, when you have all your students online it is the perfect time to do knowledge checks and go more in-depth with real-life scenarios.
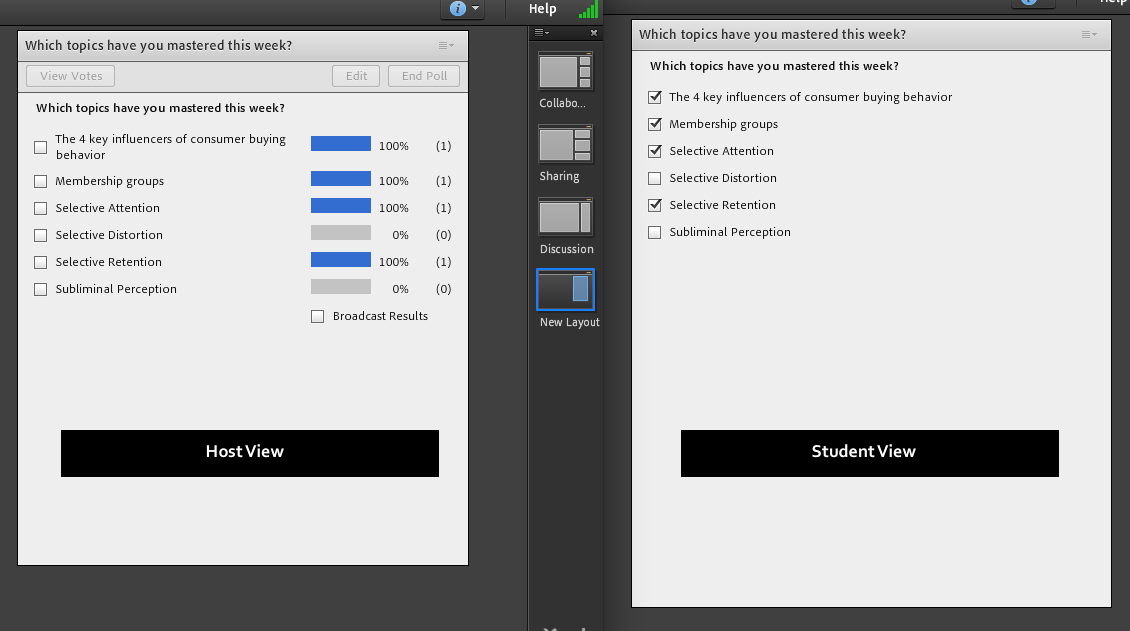
Use Polls – To gauge student understanding of the week’s material, use a quick poll to find out which topics the students feel they have mastered before starting the new discussion session. The topics that receive the lowest rating can now be covered in the VSI.
Host a Q&A Session – Have students submit questions in the Adobe Connect meeting room Q&A pod throughout the week. When you log in, you will be able to see all the questions, but the students will only see the questions he/she submitted. As you answer questions, you can delete them from your list. This will not affect the student’s pod view.

Make It Personal – Being an online student is an isolated experience. Make the most of your time with students. Greet them as they enter the meeting room, answer the dumb questions to encourage conversation, and hang around a few minutes after the meeting in case people linger to ask questions like they do in on-campus classrooms. Showing that you care about your students increases student engagement without all the bells and whistles. Even if you do not change a thing with your VSI style (if it’s not broken don’t fix it, right?) then showing that you care about your students will make all the difference.
Making small changes to your teaching style could have a bigger impact on the way your students retain information and improve the overall experience of a live online session. You do not have to use all the tips in this post, but try one out and see how it goes. It doesn’t hurt to experiment a little.
Multiple Intelligences Theory in Higher Education
Maybe you have heard of the Multiple Intelligences theory when it gained popularity in the 90s and since then students have been categorized based on the characteristics of each intelligence found in Howard Gardner’s books, Frames of Mind: The Theory of Multiple Intelligences (1983) and Multiple Intelligences: New Horizons in Theory and Practice (1993).His theory had a major impact on education, but did you know it could be used in business and daily life?
Multiple Intelligences are the different ways in which humans understand the world. These are often confused with learning styles, but where learning styles are considered to be lifelong restrictions, multiple intelligences can be developed and strengthened over time. Conflating intelligences with other desired outcomes is a practice that, according to Howard Gardner, “proves particularly notorious when it comes to the personal intelligences. Interpersonal intelligence, the understanding of other people, is often distorted as a playground for extroverts. Intrapersonal intelligence, the understanding of oneself, is often misused as a rationale for self-esteem programs or is attributed to introverts. These distortions and misapplications suggest a shallow (or nonexistent) understanding of my writings on intelligence.”
Multiple Intelligences is about problem-solving and are used every day. The blogs with the tips and tricks of getting along with coworkers or nailing that next interview will have solutions to interpersonal intelligence problems. Singing a School House Rock song during a test or remembering a jingle from 20 years ago are both using the musical-rhythmic intelligence. The intelligences exist in everyone, they just may not manifest in expected ways.
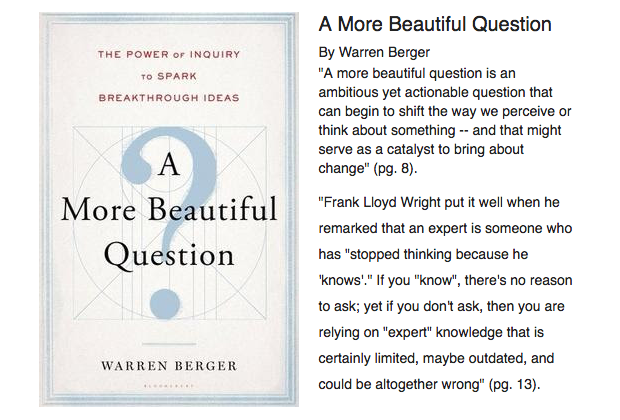
Considering multiple intelligences when designing your lessons can help students produce high-quality work. “The theory of multiple intelligences provides an opportunity to transcend mere variation and selection. It is possible to examine a topic in detail, to determine which intelligences, which analogies, and which examples are most likely both to capture important aspects of the topic and to reach a significant number of students” (Gardner, 176). You can do this by asking questions about how to approach a concept from different angles. When structuring your questions, using the phrase “how might we” can you give you a new perspective on the situation. How might we questions allow room for collaboration, brainstorming, and an opportunity for ownership of the question which spurs the questioner to find an answer.
“Everything is open to question, especially the things we thought we already knew.” – William Deresiewicz, A More Beautiful Question
Free Books Available:
If you are interested in reading some of the books mentioned in this post, please email me at channell.walker@pepperdine.edu to get a free copy.

The Benefits of Lecture Capture
High schools all over the country are hosting lectures to prepare the 2016 Senior Class for the “college experience”. Maybe you have attended one or even spoke at one of these events. There is a lot of useful and not-so-useful information provided at these lectures, and one bit that may be repeated over and over again is to “record your lectures.” This is helpful advice more students should take advantage of, but they don’t. As part of our Student Support, recorded lectures allows flexibility in a student’s education for a better learning experience.
For the student who can’t be physically in the classroom or present at the live lecture, having the ability to watch or listen to a lecture on a mobile device or home computer helps to keep that student on track. Other students have the option to revisit lectures during revision time or to take better notes. They also have the ability to pause or rewind the lecture to get a better grasp of tough concepts and this adds value to the course.
Lecture capture is useful for the professor as well. Viewer analytics can provide information on which topics students find most interesting and the recordings can be used to improve lecture content and delivery. A professor can see which lectures had the least amount of student engagement and can revise that lecture for future presentations to spark more interest.
If you haven’t recorded your lectures before, you should consider the benefits for your students. You can start capturing your lectures with TechSmith Relay now or learn how to access your Adobe Connect Recordings here.
Don’t have a TechSmith Relay account? Learn how to register for one here.
Adobe Connect Presenter Only Mode
If you have taught or are currently teaching an online or flex course, then you are probably familiar with Adobe Connect. For those who don’t know, Adobe Connect is used for live online meetings, specifically the virtual synchronous instruction sessions. It allows you to share your screen, video chat, and interact with your students from pretty much anywhere; but I’m here to tell you about one of the recent updates called the Presenter Only Area. It’s a handy little feature that keeps some things private during sessions.
What is the Presenter Only Area?
It is a second display in your Adobe Connect meeting room that can only be viewed by the host or presenter roles. Attendees cannot see this area.
Why Use the Presenter Only area?
Let’s say you have guest speakers presenting at one of your VSIs. You want everything to run smoothly for the students so you can use the Presenter Only Area as a backstage function. By adding a chat pod to the Presenter Only Area, you can chat with the presenters without the students knowing. So comments like, “I’m having trouble with my mic. Give me a few minutes.” Or “How do I share my powerpoint?” won’t be viewed by your attendees and problems can be solved quickly and quietly behind the scenes. Your session looks more professional and no one is embarrassed.
The Presenter Only Area is customizable, so you aren’t restricted in the kinds of pods you can add to it. Just be careful not to build your whole meeting room in the Presenter Only Area because your students will log in and see only a blank gray screen.
Watch this video to find out how to set up a Presenter Only Area in your Adobe Connect meeting room.
Update: Finally, It’s Around the Corner
I have been working on a project for a few months. It’s a pretty big event for MCC Library and it’s coming up this Tuesday. I’m both excited and a little nervous about it because this is going to be my first event. We have been throwing the idea around and planning for over a year, I think.
This event started out as a TED talk, but that was too complicated to put together for such a small library. So, we nixed that idea over the summer and started planning what we call, Digital Learning Day. We wanted to show the technology that’s available on campus in a fun and festival-like atmosphere.
I was in charge of creating an online registration form, logo, flyers, digital signage, A-frame signage, and stickers to give away. I think I’m most excited about the stickers. Honestly, when they arrived I showed them off to everyone. I was just walking around full-on ear-to-ear smile and waving the stickers around.
For some reason, seeing my work in print makes me super happy. Every. Single. Time.
I especially love seeing my work in unexpected places like when the professors print out a flyer and post it on their doors. It makes me feel like patting myself on the back. Literally.
Well, after next week I will be able to share more details with you all and add to my projects page; but for now, I’ll say goodbye.
My Latest Work
I’m pretty sure I am about to open up this blog with a lame post, but I’m proud of this project.
I just finished the digital flyer for MCC Library’s Holiday Display contest and I like it.
So here’s the story:
During the summer, I was asked to put together some ideas for contests the library could host throughout the school year. We decided to have 3 contests for each semester, 6 in total. For this semester, we had a video contest, costume contest, and a Bookmas Tree contest planned. 
I made the logos for all the contests and I worked on the digital signage and printed materials over time. So two weeks ago, I started working on the digital flyer for the Bookmas Tree contest and that’s when I found out that the tree was out and the Snow Bookman was in. I didn’t know what to do with all the stuff I had prepared for a christmas tree theme.
Then, I was told that there was a conflict amongst the staff on whether or not to make a tree or a snowman out of books. That made everything more complicated for me. I had spent 3 days working on the flyer which included a whole weekend building christmas trees out of newspaper and photographing them. I didn’t want all that work to go to waste. So, what did I do? I took the vague approach.
Since the display was something they wanted to do every year and the tree was something they did not want to do every year, I gave the contest a name that would fit whatever they chose to do from here on. That way I could keep my trees even if I had to ditch the logo.

I built the flyer on Photoshop. Edited my camera phone pictures and typed up something nice and sweet for the flyer. Then I decided that I hated it, tweaked it, and now I love it.
Take a look at the finished product below.

